This tutorial will show how to create a very simple abstract shape using a few brushes and effects. For this tutorial I will be using Adobe Photoshop CS3. If you have an older version of Adobe Photoshop, you may still be able to follow this tutorial.
Keep in mind that it would be nearly impossible to duplicate this exact object, but this tutorial should give a guide to creating your own unique object. You should end up with something like this.
The first thing we need to do is download the brush set for this tutorial. You can download the free Trance Brushes from Brusheezy.com by clicking here.After you download the brushes, extract the .abr file from the .zip and save it. Open Adobe Photoshop and create a new document 700×700.
 Fill the background layer with black (#000000) and select the brush tool.
 Load the brush set that you just downloaded by clicking the drop down next to the brush > the arrow point right > then the load option.
 Select the Trance Brushes and load them. You will see the new brushes appear at the bottom of the brush set.
 Reset the color swatches so that white is the foreground color and black is the background color. Create a new layer and use some of the brushes to create an abstract shape. When you are painting with these brushes, do not drag the mouse like you normally would. Instead click once to create the shape. There is really no science to this. First I will use brush 305 to create this.
Open Adobe Photoshop and create a new document 700×700.Fill the background layer with black (#000000) and select the brush tool.Load the brush set that you just downloaded by clicking the drop down next to the brush > the arrow point right > then the load option.Select the Trance Brushes and load them. You will see the new brushes appear at the bottom of the brush set.Reset the color swatches so that white is the foreground color and black is the background color. Create a new layer and use some of the brushes to create an abstract shape. When you are painting with these brushes, do not drag the mouse like you normally would. Instead click once to create the shape. There is really no science to this. First I will use brush 305 to create this. Next I will add a few more with #213.
 Then I will use 215 to make a tail.
 To complete this shape I will dab a couple times with the brushe that is numbered 380 for me.
 Like I said before, there is no set way to do this, just come up with a shape you like. Now to add a little bit of color I will apple a purple glow. Right click on the layer in the layers pallet and select blending options.
 Apply an outer glow using the color #7200ff.
 I also added an inner glow using the same color #7200ff.
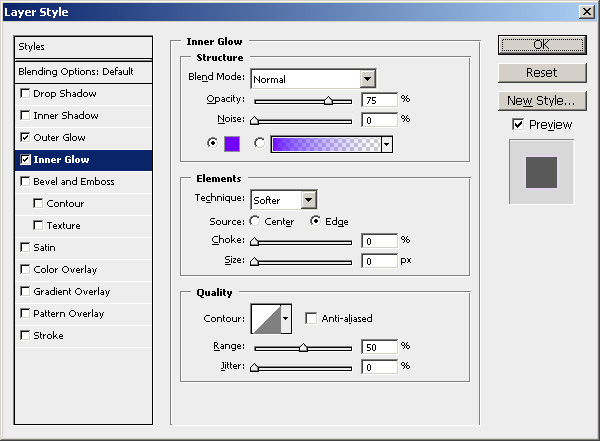 Apply the changes and you should get something like this.
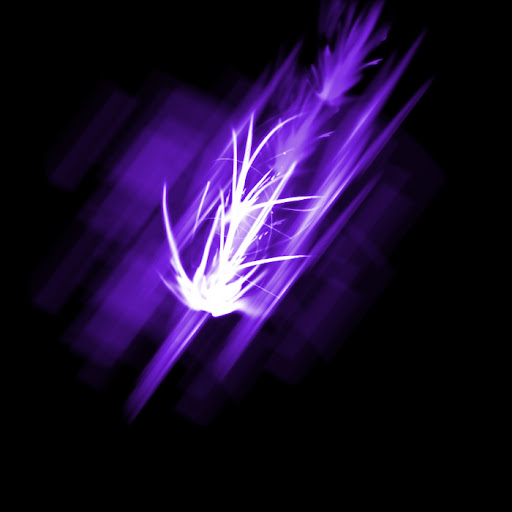 Now we are going to distort the image using the polar coordinate filter. Click Filter > Distort > Polar coordinates.
 Make sure that Rectangular to Polar is selected and click ok
 You will get something like this.Where the object is located on the canvas will effect how it is distorted. If you do not like the way it came out, undo the filter and move the object. Then try to apply the filter again. Mine looks ok, but I think it is a little blurry.
I am going to apply the Smart Sharpen filter to sharpen up the image. Click Filter > Sharpen > Smart Sharpen.
 You will have to play with the settings to see what looks the best for you, or you could skip this step completely. Here is what I used.
 This is what my image looks like now.That is all it takes to create a simple abstract shape using brushes. If you do a search online you can some great free brushes to play around with. You could also add some text to this and make into a background or something.
 You can source
No comments:
Post a Comment