First open up Photoshop. That seems an obvious step, but you have to start somewhere. Once you open Photoshop you must set the color to RGB and the resolution of 72 dpi. This is web standard and it saves you a lot of headaches in the future. The size in pixels, and what size you want. If you are going to make an animated ad, it would be best for an IAB standard ad format to use.

This simple animation combines the two most common animation techniques in Photoshop: Turning layers off and on, and using the Tween command to animate the movement of an object on a layer.
Step 1: Set up your layers.
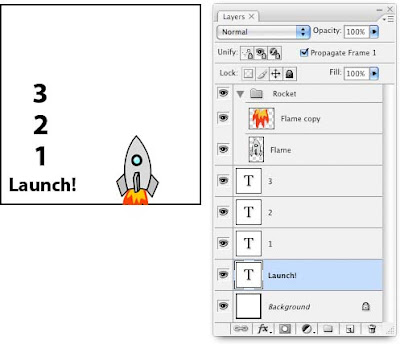
The first step in creating any animation in Photoshop is to build a layered Photoshop file with all the elements you plan to animate. Our example document has 7 layers containing the text for our countdown, and layers for the rocket and flame.
Step 2: Create Animation Frames with Layer Visibility.
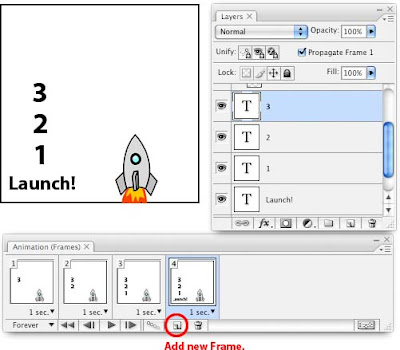
Chose Windows > Animation to show Photoshop’s animation palette.
On the first frame, turn off visibility for all layers you do not want visible at the start of your animation. Then add one frame at a time, and turn on the layers you want visible for each step in the animation.
Changing layer visibility one frame at a time is a classic Photoshop animation technique that covers a wide variety of needs.
In our example, continue this pattern to reveal the countdown and the flame at the bottom of our rocket.
Step 3: Create Animation Frames using Tween.
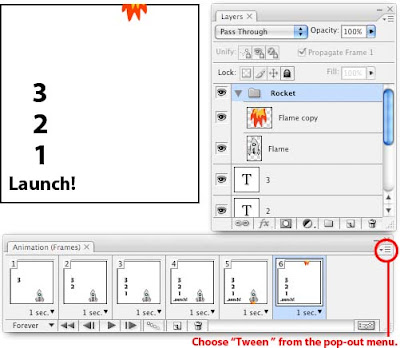
Now that the countdown is complete, we need to create the illusion that our rocket ship is taking off. Add one more frame, and this time select the group called “Rocket” in layers and move your rocket off the top of your image window.
Then choose “Tween…” from the Animation palette’s pop-out menu.
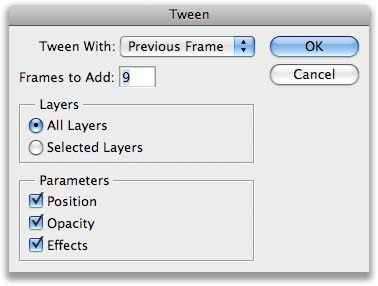
Set how many frames to add, and Photoshop spreads the movement of your layer across those extra frames.
Step 4: Adjust your Timing.
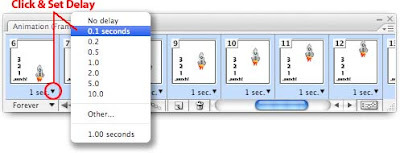
Finally, go back through and adjust the delay for each frame of your animation. That time is shown in seconds below each frame.
Tip: You can hold down the Shift-key to select a range of frames (such as the 9 frames we added for the rocket’s takeoff) and change them together.
Step 5: Export the Animated GIF.
Finally, to export your animated GIF choose:
In Photoshop CS3: File > Save For Web & Devices…
In Earlier Photoshops: File > Save For Web…
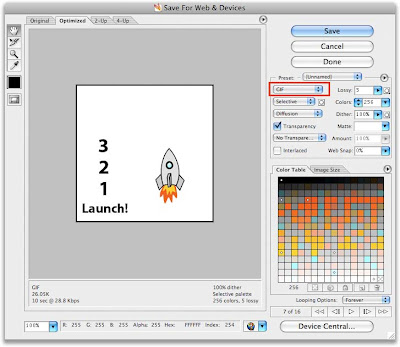
Make sure the image type is set to GIF, feel free to experiment with some of the other options, and save your file.
